Follow Me On Social Media!

Danish Butter Cookies: Irresistibly Buttery Bliss at Home
Introduction to Danish Butter Cookies
When you first bite into a Danish butter cookie, the delicate crunch gives way to a melt-in-your-mouth buttery richness that seems to epitomize home-baked comfort. These cookies are not just a delightful treat; they symbolize warmth and care, often crafted with love and shared with family and friends. Picture a chilly evening, maybe a cozy gathering with loved ones, where the aroma of freshly baked cookies fills the air—there’s something magical about that, isn’t there?
The history of Danish butter cookies traces back to Denmark, where they are often associated with festive celebrations, yet they hold a charm that makes them perfect for any occasion. Whether you’re indulging yourself or hosting a gathering, these cookies add a touch of sweetness that everyone appreciates. I remember the first time I attempted to make them myself; it was both a challenge and a joy as I watched them come to life in my kitchen.
What makes these cookies truly special is their versatility. They can be piped into beautiful shapes, studded with chocolate, or left plain for those who appreciate simplicity. Each creation allows you to express your individuality while remaining true to the traditional recipe.
The Irresistible Allure of Home-Baked Cookies
Nothing compares to the satisfaction of pulling a tray of Danish butter cookies from the oven, golden and fragrant. The crispy edges and soft centers beckon you for just one more bite. With a handful of ingredients, you can create a batch that can quickly become a staple in your home. Think about how difficult it is to resist reaching for a cookie with someone else’s name on it. Now imagine it being your own baked creation, ready to be savored with a cup of tea or coffee.
These cookies aren’t merely about taste; they’re about connection. They bring people together, evoke memories, and create new traditions. Whether you enjoy them fresh from the oven or saved for a special occasion, Danish butter cookies are bound to become a favorite in your recipe repertoire. So, shall we dive into the ingredients that make this delightful treat?
Key Ingredients for Danish Butter Cookies
When baking Danish Butter Cookies, it’s all about using the right ingredients to achieve that melt-in-your-mouth goodness. Each component plays a crucial role in creating these irresistible treats.
Butter: The foundation of any great cookie, unsalted butter is essential for achieving a rich, tender texture. It provides the depth of flavor that makes each bite so satisfying.
Sugar: Granulated sugar is key, balancing sweetness and texture beautifully. Its fine crystals ensure a light, crisp bite that holds up when layering flavor.
Egg: Including a room temperature large egg contributes to the overall richness and helps bind the ingredients, providing the lovely structure essential for the cookies.
Vanilla Extract: Pure vanilla extract adds delightful aromas and enhances the buttery flavor profile, making the cookies even more inviting.
Flour: All-purpose flour serves as the backbone of these treats. Accurate measuring is crucial to avoid a dense outcome, ensuring that each cookie has a perfect shape and texture.
Cornstarch: Consider this the secret weapon—a touch of cornstarch creates that famous crumbly texture that simply melts in your mouth.
Dry Milk Powder: Adding richness and a delightful flavor, dry milk powder ensures the cookies stay soft, providing that perfect bite every time.
Salt: Just a pinch of salt rounds out the sweetness, elevating all the flavors to shine through.
Milk: A small amount of milk (1-3 tablespoons) adjusts the cookie dough consistency for easier piping, ensuring beautiful, uniform shapes.
These key ingredients are the building blocks for Danish Butter Cookies that are sure to impress at any gathering!
Why You’ll Love These Danish Butter Cookies
Classic appeal
There’s something undeniably enchanting about Danish butter cookies. Perfectly crisp, with a delicate melt-in-your-mouth texture, they have a way of bringing people together. Whether you’re hosting a cozy gathering, enjoying afternoon tea, or simply indulging in a late-night snack, these cookies fit the bill. Their buttery flavor and charming designs make them a timeless favorite that can elevate any occasion.
Versatile designs
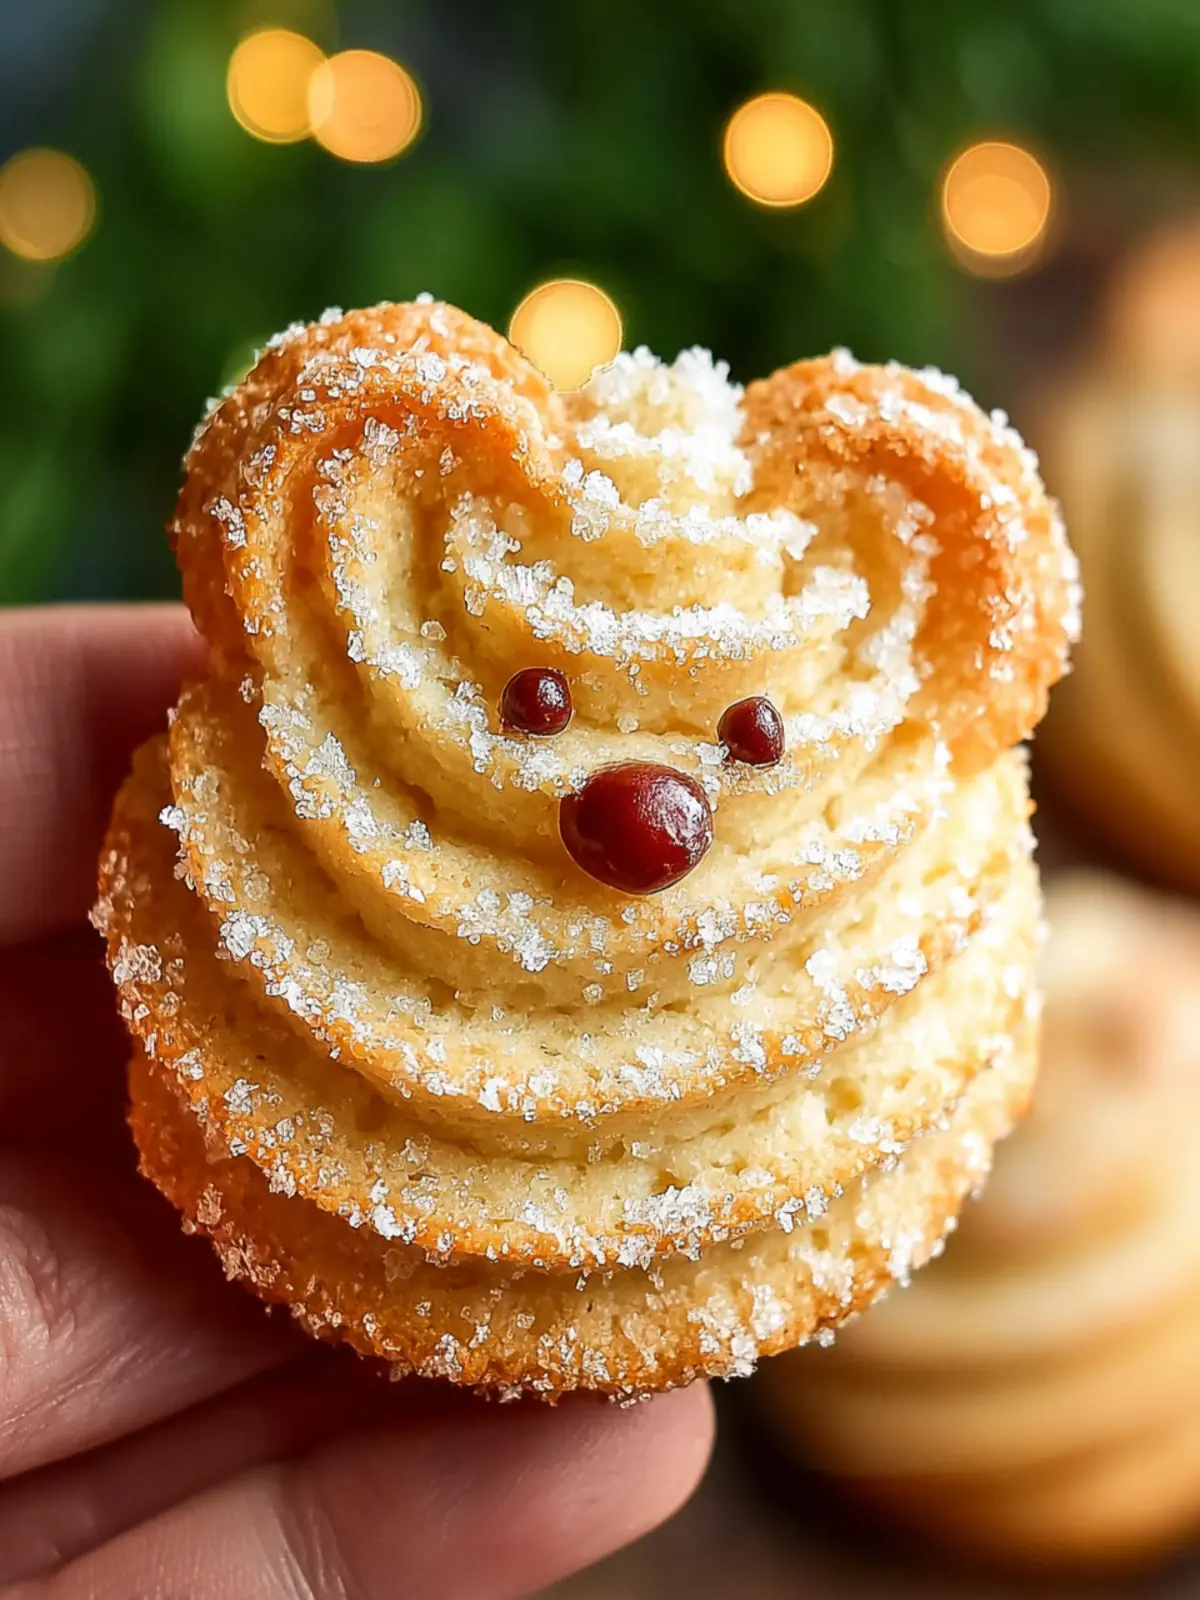
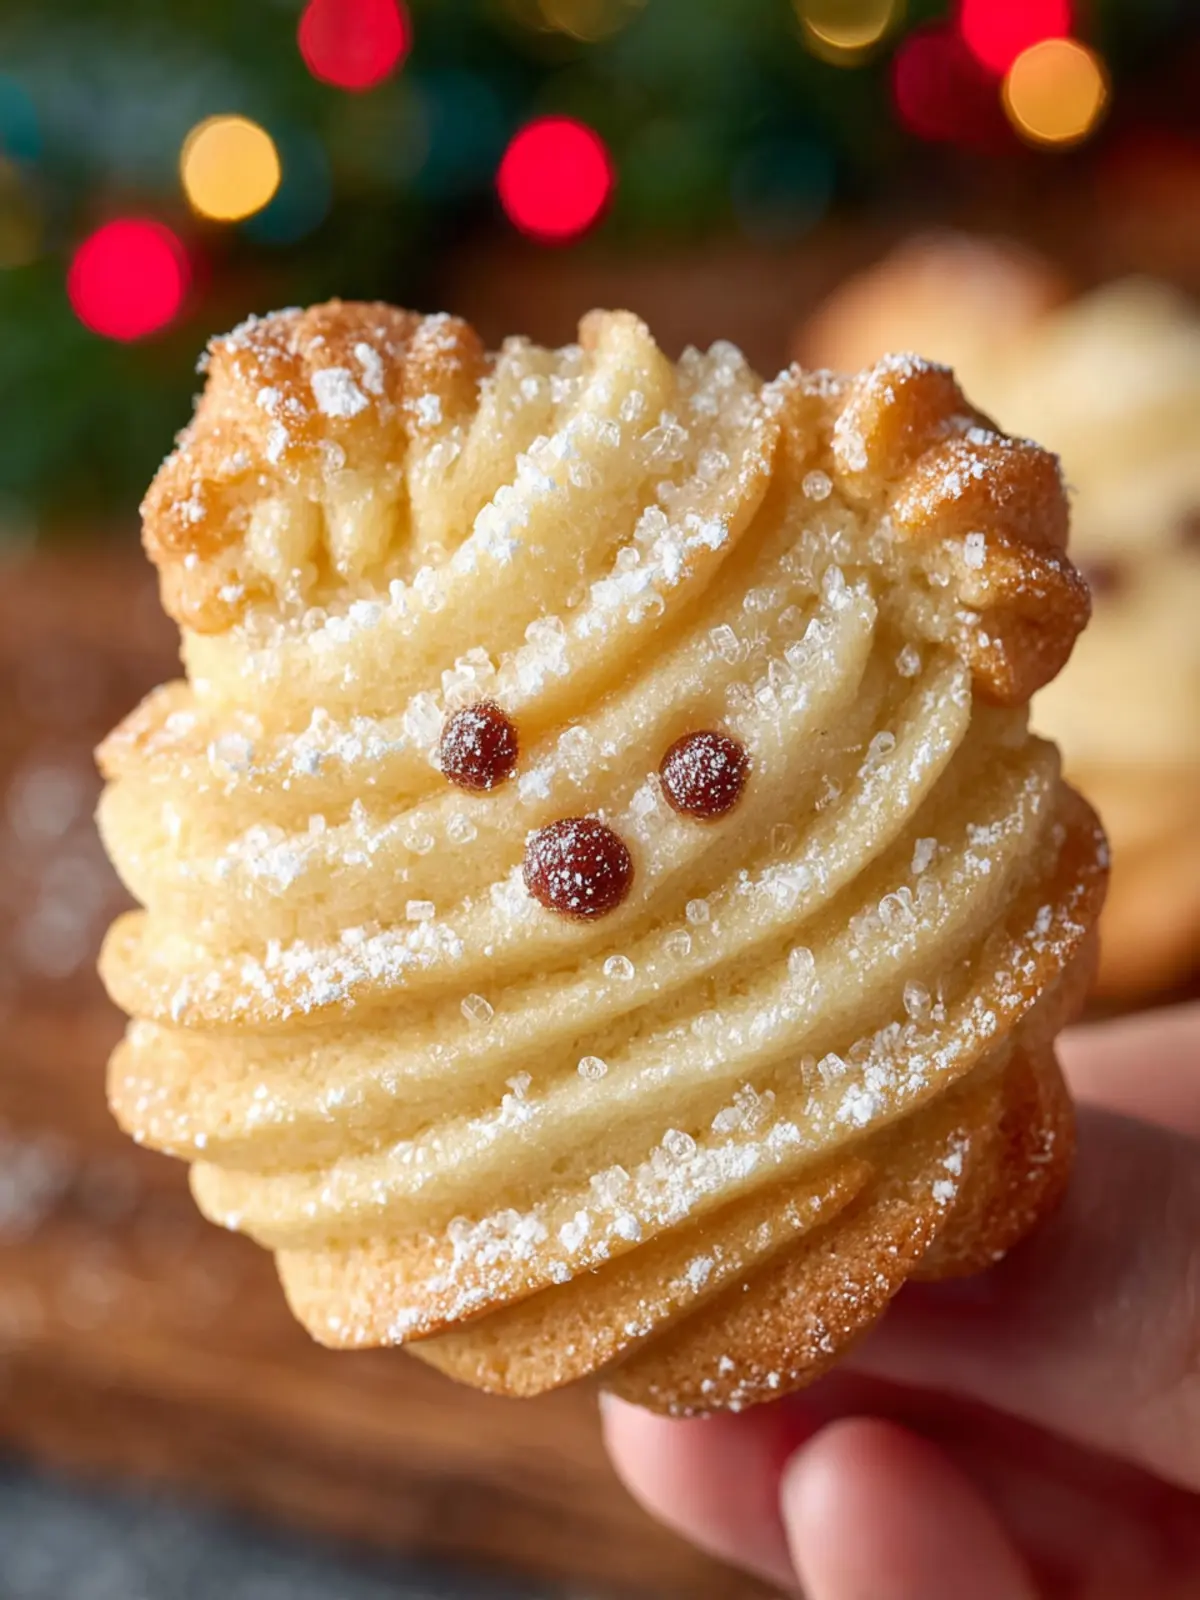
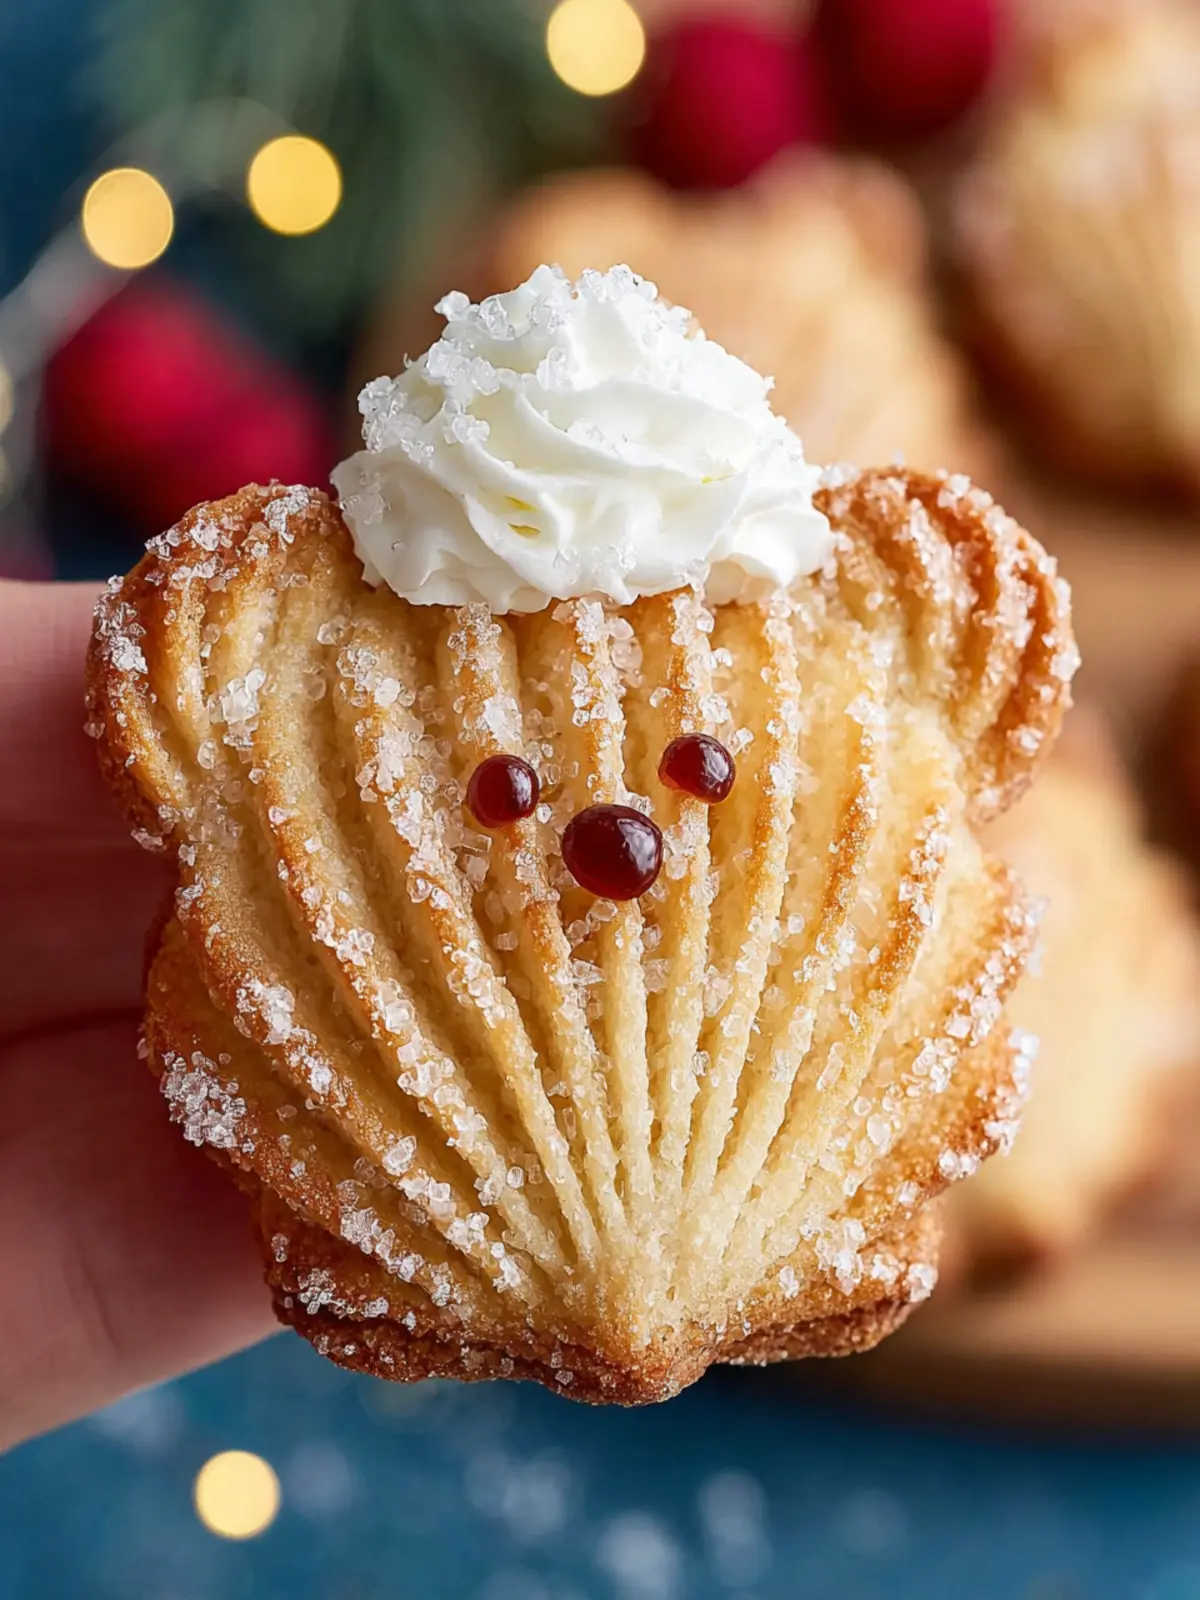
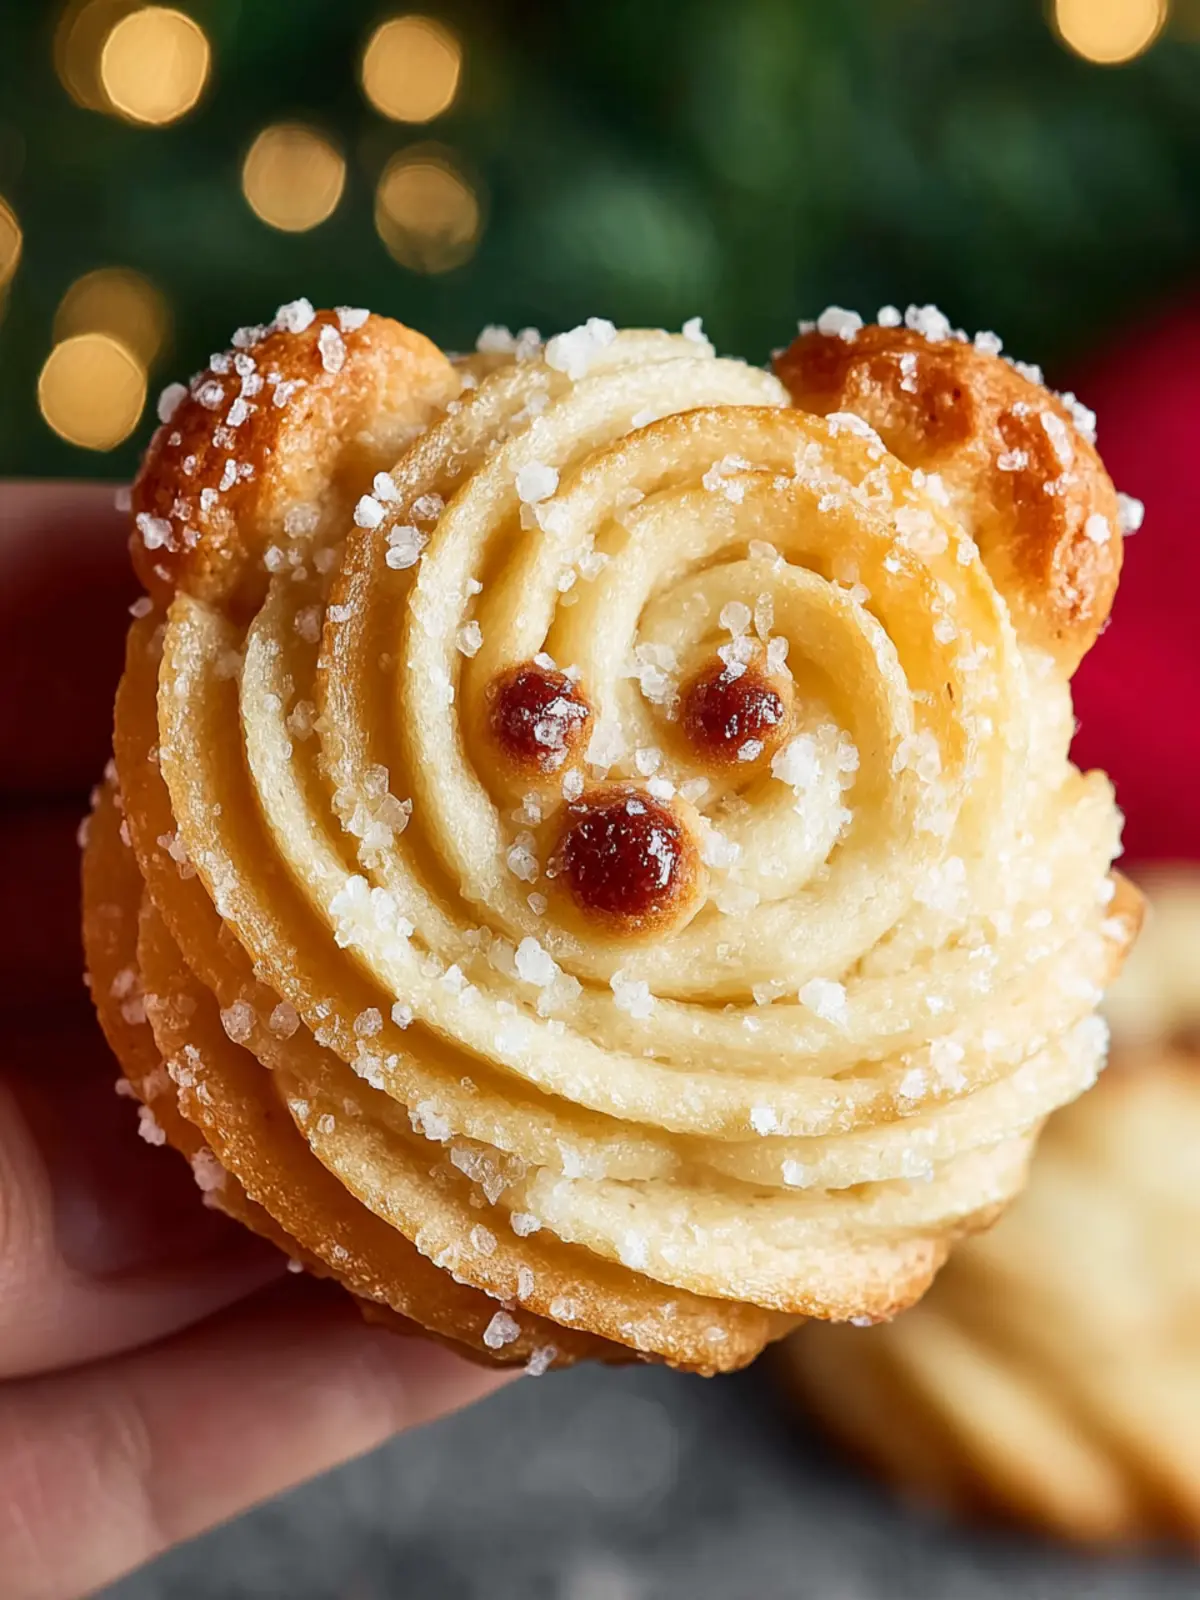
One of the most delightful aspects of making Danish butter cookies lies in the creativity they inspire. The dough can be easily piped into a variety of shapes—think flowers, stars, or classic rounds—allowing you to tailor your treats to suit the mood. Want to impress at a birthday party? Pipe colorful swirls. Hosting a formal gathering? Create elegant, decorated rounds! Unleash your artistic side and let the cookie designs reflect your personality or the theme of your event.
Easy to make
Whether you’re a novice baker or a seasoned pro, you’ll find making Danish butter cookies a breeze. The simple ingredients come together quickly, and there’s minimal waiting time. This simplicity makes them a perfect project for a relaxing weekend afternoon or an inspiring gift baking challenge. In no time, you’ll have a delightful batch that will surely impress your family and friends—and perhaps even yourself!
Tips for Making Perfect Danish Butter Cookies
Baking Danish butter cookies is an art that invites a bit of careful attention to detail. Achieving that melt-in-your-mouth texture and rich flavor requires just the right approach. Here are some essential tips to elevate your cookie game!
Importance of Measuring
Accurate measurement is vital when crafting your Danish butter cookies. Using a scale can make a world of difference, ensuring that you hit the perfect ratios of butter, flour, and sugar. Even a slight variation can affect the cookie’s texture and taste. For instance, too much flour might lead to a drier cookie, while too little could result in a cookie that spreads too thin.
Room Temperature Ingredients
For a smoother mixing process, it’s crucial to use room temperature ingredients. When your butter is soft, it blends more seamlessly with sugar, leading to a light and airy batter. Similarly, bringing your eggs to room temperature helps create that perfect consistency that encourages even spreading during baking.
Baking Time
Keep a close eye on your cookies as they bake. You’re aiming for those lovely golden edges that indicate perfection. Remember, every oven is different. If you check at the minimum baking time and they aren’t ready, don’t hesitate to add a couple more minutes. Just be cautious not to overbake; the golden color should be achieved without losing that delightful softness.
With these tips in hand, you’re now ready to impress at your next gathering with the ultimate batch of Danish butter cookies!
Time Details for Danish Butter Cookies
When it comes to crafting the perfect Danish Butter Cookies, timing is everything. The process is quick and satisfying, and knowing this will help you manage your kitchen time effectively.
Preparation time: 15 minutes
Gathering your ingredients and prepping your dough takes just 15 minutes. This phase is crucial, so take your time to ensure everything is ready for mixing.
Baking time: 15-20 minutes
Once your dough is piped onto the baking sheets, pop them in the oven for 15 to 20 minutes. Keep an eye on them to achieve that perfect golden-brown hue.
Total time: 35-40 minutes
In less than an hour, you can enjoy the delightful aroma of Danish Butter Cookies wafting through your home. Now, imagine the joy of sharing these sweet treats with friends and family!
Nutritional Information for Danish Butter Cookies
When you indulge in Danish Butter Cookies, it’s good to know what you’re treating yourself to! These buttery delights are a perfect blend of flavor and festive spirit.
Calories: per cookie
Each cookie packs about 150 calories, which makes it an easy snack for those cozy evenings, but moderation is key!
Protein: per cookie
With approximately 2 grams of protein per cookie, they won’t contribute much to your daily intake, but every little bit helps when you’re out and about!
Sodium: per cookie
At around 50 milligrams of sodium per cookie, these treats are moderately low in salt, making them a pleasant option for satisfying your sweet tooth without the extra sodium worry.
Enjoy these delightful Danish Butter Cookies, but remember to share—they’re sure to make everyone smile!
FAQ about Danish Butter Cookies
When you indulge in a batch of Danish Butter Cookies, you’re not just enjoying a treat; you’re savoring a little piece of Danish culture. These cookies, known for their buttery flavor and delightful crispness, have become a beloved classic for many. Here’s a handy FAQ to help you make the most of your cookie-baking experience.
Can I store Danish Butter Cookies?
Absolutely! To maintain that delightful texture and rich flavor, store your Danish Butter Cookies in an airtight container at room temperature. They can last up to two weeks this way. If you want them to stay fresh even longer, consider refrigerating them, which can extend their shelf life for a month or more.
How can I make my cookies extra crispy?
If you crave extra crispiness in your cookies, the key lies in a few simple adjustments:
- Use cold butter: Chilled butter can create a snappier texture.
- Don’t overmix the dough: Mix just until the ingredients combine. Overmixing can make your cookies tough.
- Bake longer: Keep an eye on them as they bake; extending the time by a few minutes will enhance that crisp factor.
Is it possible to freeze the dough for later use?
Yes, freezing the dough is a fantastic option for busy bakers! After preparing your Danish Butter Cookies dough, wrap it tightly in plastic wrap and place it in an airtight container. The dough can be frozen for up to three months. When you’re ready to bake, simply thaw it in the refrigerator overnight and proceed with your cookie-shaped masterpiece!
Conclusion on Danish Butter Cookies
Embracing the joy of baking: These cookies are a perfect way to bring warmth and love into your home. There’s something incredibly satisfying about the delicate crunch and buttery flavor of Danish Butter Cookies. Whether shared with loved ones during the holidays or enjoyed with a cup of tea on a quiet afternoon, they create moments of joy. With their simple ingredients and straightforward preparation, these cookies invite you to slow down and engage with the art of baking. So gather your ingredients, preheat the oven, and allow the delightful aroma to fill your kitchen, making every bite taste like home.
Print
Piped Cookies
- Total Time: 40 minutes
- Yield: 24 cookies 1x
- Diet: Vegetarian
Description
Delicious piped cookies that are easy to make and fun to decorate.
Ingredients
Scale
- 1 cup (225g) unsalted butter, softened
- 1/2 cup (100g) granulated sugar
- 1 large egg, room temperature
- 1 teaspoon pure vanilla extract
- 2 1/4 cups (290g) all-purpose flour, spooned and leveled
- 1/4 cup (30g) cornstarch
- 2 tablespoons dry milk powder
- 1/4 teaspoon salt
- 1–3 tablespoons milk
Instructions
- Preheat your oven to 325F.
- Before you start: To ensure the cookies spread perfectly, it’s important to measure the flour carefully to make sure you have the right amount. Using a food scale is always the most accurate choice, but if you’re using cups, don’t scoop the measuring cup directly into the bag of flour or this will pack it in and lead to a dry cookie dough. Instead, use a spoon to lightly fluff the flour in the bag then use that spoon to scoop the flour into your measuring cup. Also make sure the fridge ingredients are at room temperature to ensure the cookies don’t overspread.
- In a large mixing bowl, combine butter and sugar. Use an electric mixer fitted with the paddle attachment to cream on high speed for a FULL 2 minutes or until light and fluffy.
- Scrape down the bottom and sides of the bowl then add in the egg and vanilla. Mix again on medium speed for about 1 minute or until smooth. It will separate at first but should come together into a smoother mixture after about 1 minute of mixing.
- Add about half of the flour along with all of the cornstarch, milk powder, and salt.
- Mix on low speed to combine then mix in the remaining half of the flour followed by 1 tablespoon of milk.
- Transfer a bit of the cookie dough into a piping bag fitted with any tip you’d like. Test pipe a little bit of the dough – it should take a good amount of pressure to come out but it should flow smoothly without breaking. If the dough breaks when you try to pipe it out, add a bit more milk and try again. The key is to add as little milk as possible so the cookies keep their shape.
- Once the dough is the right consistency, fill the piping bag with as much dough as it can fit.
- Smear a tiny blob of cookie dough into the corners of a large baking sheet then lay a piece of parchment paper on top and press to stick it to the cookie dough in the corners. This helps hold the parchment paper in place so it doesn’t lift up as you pipe!
- Pipe whatever design you’d like with the cookie dough onto the parchment paper – some popular options are Christmas trees, swirls, rings, S shape, or polar bears! Leave at least 2 inches of space between each cookie on the baking sheet.
- Bake the cookies in the center of your preheated oven for 15-20 minutes or until lightly browned around the bottom edges. Larger cookies will need to bake closer to 20 minutes and smaller cookies will need around 15 minutes.
- Cool the cookies for 10 minutes on the baking sheet then carefully transfer them onto a wire rack to finish cooling.
Notes
- Dry milk powder helps to create a better texture in the cookies.
- Prep Time: 20 minutes
- Cook Time: 20 minutes
- Category: Dessert
- Method: Baking
- Cuisine: American
Nutrition
- Serving Size: 1 cookie
- Calories: 100
- Sugar: 5g
- Sodium: 50mg
- Fat: 6g
- Saturated Fat: 4g
- Unsaturated Fat: 2g
- Trans Fat: 0g
- Carbohydrates: 13g
- Fiber: 0g
- Protein: 1g
- Cholesterol: 30mg