Follow Me On Social Media!

Fruit Christmas Tree: A Festive, Juicy Twist for Your Table
Introduction to Fruit Christmas Tree
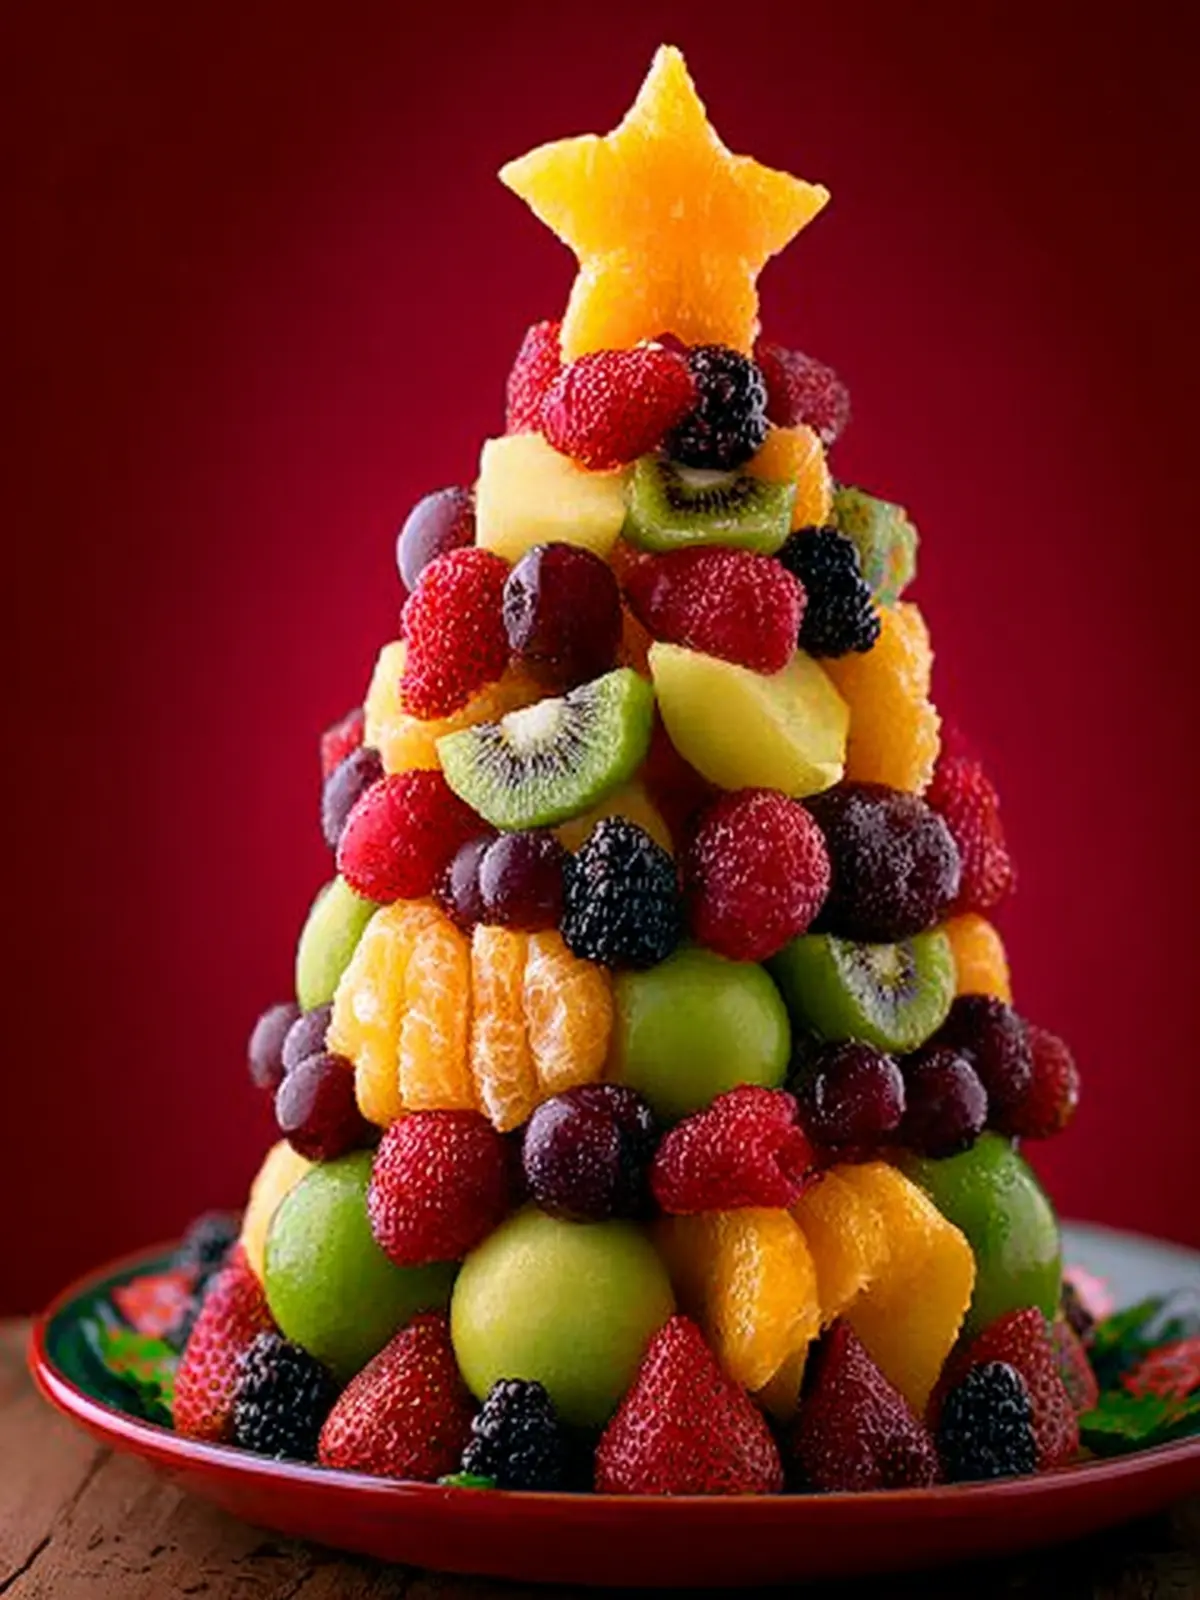
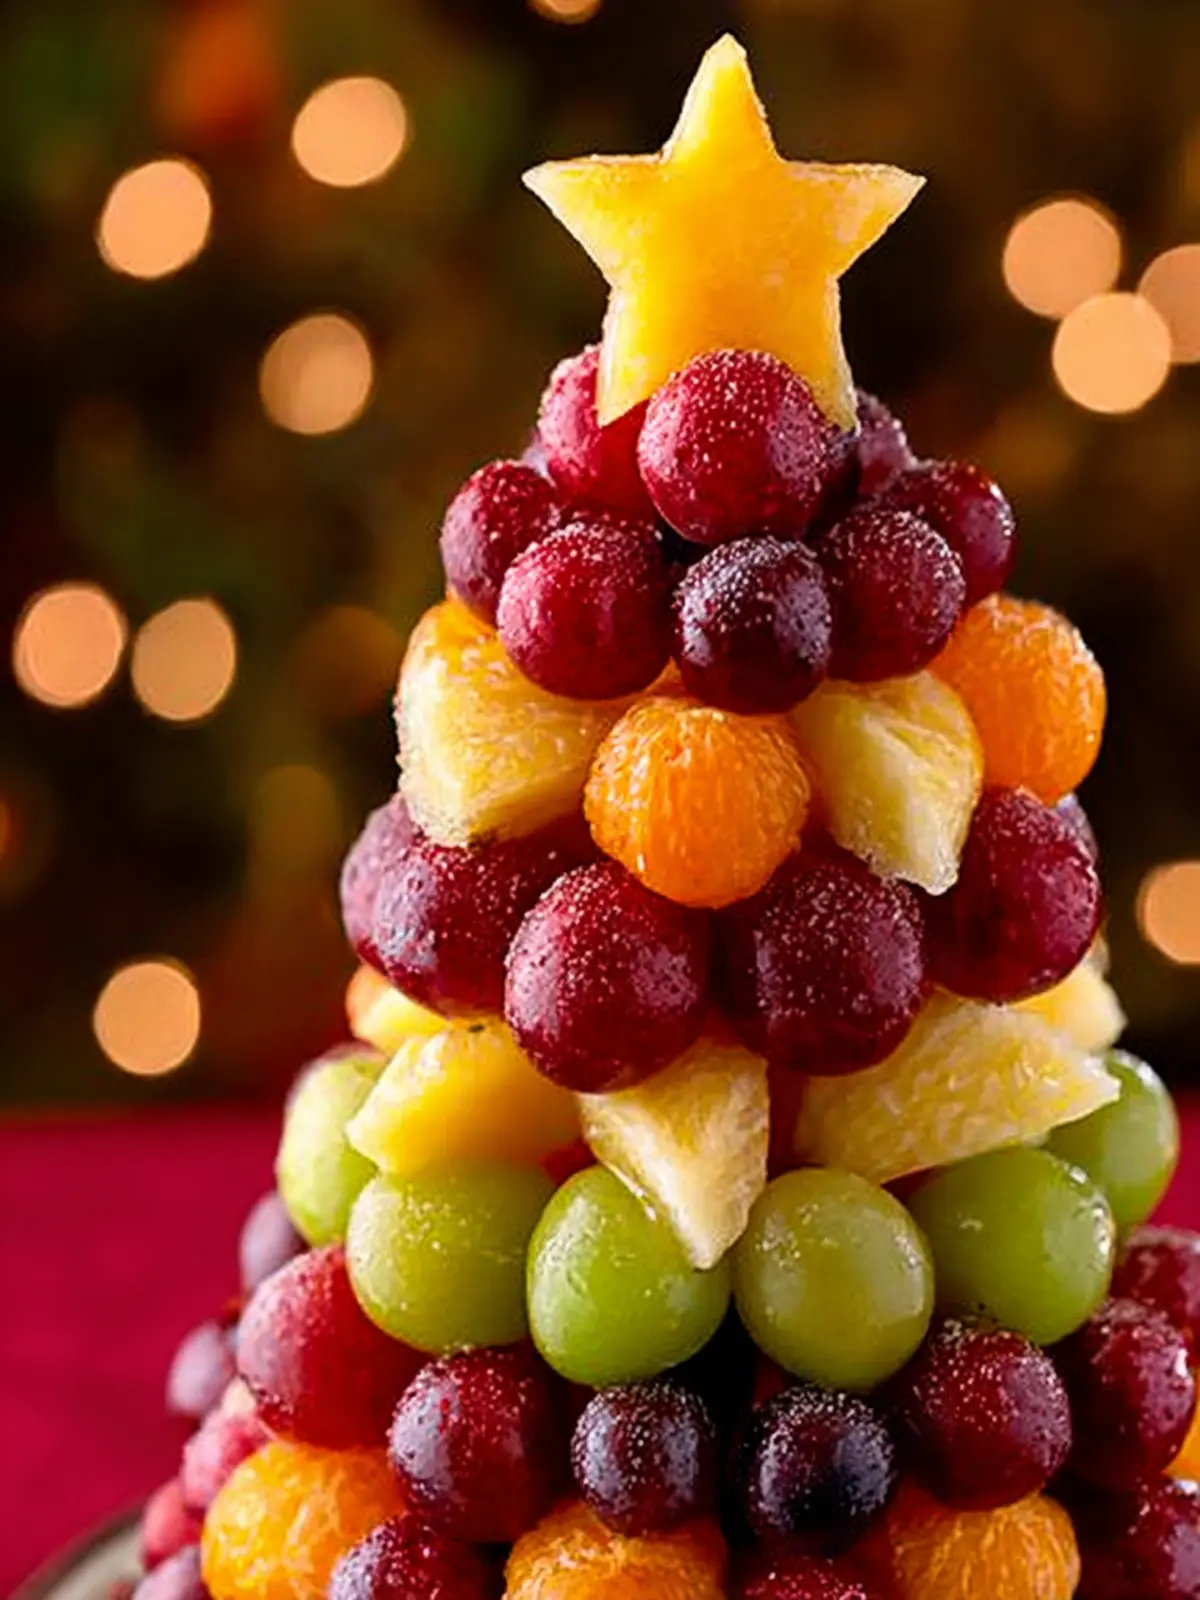
Creating a Fruit Christmas Tree is not just about presenting a vibrant centerpiece; it mirrors the warmth and joy of the holiday season in every slice. Imagine gathering with friends and family, the aroma of festive treats in the air, and your beautifully arranged fruit tree taking center stage on the table, inviting everyone to share in its colorful delights. This eye-catching and nutritious edible art brings a playful twist to traditional holiday decorations, making it more than just a dish—it’s a delightful experience.
The idea of a Fruit Christmas Tree stems from the desire to celebrate the season with fresh, wholesome ingredients. As the seasons change and vivid fruits come into peak season, this unique dessert beautifully highlights those offerings. You simply can’t beat the surprise and joy in each bite, especially when the flavors burst on your tastebuds. Plus, it is an excellent option for those looking to sprinkle some health into their holiday festivities without sacrificing flavor or fun!
One of the best things about a Fruit Christmas Tree is that it’s customizable. You can choose your family’s favorite fruits, allowing kids and adults alike to feel involved in the creation process. It’s a festive activity that’s bound to spark creativity and conversations around the holiday table. Whether it’s melons, berries, grapes, or citrus, each fruit can represent a different ornament on the tree, creating a delicious blend of natural sweet flavors.
Making a Fruit Christmas Tree can even become a cherished family tradition. Get everyone involved; allow kids to help with arranging the fruit, sharing laughter and stories as they create their edible masterpiece.
In the following sections, we will delve into the essential ingredients and step-by-step instructions to create your very own delicious and festive Fruit Christmas Tree, ensuring that your holiday gatherings are both healthy and enjoyable. So, roll up your sleeves and let’s dive into this fruity feast that promises to bring joy to your holiday season!

Key Ingredients for Fruit Christmas Tree
Creating a Fruit Christmas Tree is a delightful way to celebrate the festive season, combining both visual appeal and deliciousness in each bite. To craft this fun centerpiece, you’ll need a selection of vibrant, fresh fruits and a few essential items to bring it all together.
-
Fruits: Start with a variety of colorful fruits. I recommend using strawberries, grapes, kiwis, and bananas for their vibrant colors and contrasting textures. Fresh fruits not only make your tree visually stunning but also provide refreshing flavors that your guests will love.
-
Wooden Skewers: These are crucial for assembling your fruit tree. Choose sturdy skewers that can hold the weight of the fruits securely. They will help you stack your fruits in the shape of a tree easily.
-
Base: For stability, opt for a floral foam block or a sturdy base like a large styrofoam cone. This ensures your fruit tree remains upright and maintains its shape throughout the festivities.
-
Edible Decorations: Lastly, consider using tiny candies or nuts to add decorative flair. These can be placed as ornaments on the tree, adding a touch of sweetness and texture.
With these key ingredients, your Fruit Christmas Tree will not only be a feast for the eyes but also for the taste buds, making it a perfect addition to your holiday celebrations.
Why You’ll Love This Recipe
Crafting a Fruit Christmas Tree is not just about creating a delightful dish; it’s about fostering joy, creativity, and connection during the festive season. Imagine gathering your loved ones around, watching their eyes light up as this colorful centerpiece graces your table. This recipe transforms an ordinary fruit platter into a captivating holiday display that everyone will want to photograph and share.
Here’s why making a Fruit Christmas Tree should be at the top of your to-do list this holiday season:
-
Healthful Indulgence: During a time filled with rich desserts, this recipe offers a refreshing, guilt-free option that bursts with vitamins and flavors. Fresh fruits like strawberries, kiwi, and grapes provide a natural sweetness and nutritional boost that you can feel good about.
-
Creative Expression: Each tree can be uniquely decorated with your favorite fruits, nuts, and edible decorations. This lets you unleash your inner artist while preparing a dish that’s as fun to make as it is to enjoy.
-
Family Bonding: Gather friends and family to help assemble your Fruit Christmas Tree. It’s a perfect opportunity to create cherished memories together, all while engaging in a fun, hands-on activity that promotes teamwork and laughter.
This festive treat is sure to become a beloved tradition in your holiday celebrations!
Variations for Fruit Christmas Tree
Creating a Fruit Christmas Tree offers a canvas for your creativity. Don’t feel confined to just one type of fruit; feel free to explore variations that tickle your taste buds and brighten your table.
Explore Different Fruits
- Berries Galore: Replace grapes with strawberries or raspberries for a pop of color and a tangy bite.
- Tropical Twist: Pineapple or mango slices can add a tropical flair that contrasts beautifully with the more traditional fruits.
- Citrus Surprise: Oranges or mandarins can add a citrusy zest; just peel and slice them for easy decorating.
Creative Garnishes
Incorporating garnishes can elevate your Fruit Christmas Tree. Think about using:
- Coconut Flakes: Sprinkle shredded coconut for a snowy effect that mimics fresh fallen snow on a winter’s day.
- Mint Leaves: Add sprigs of fresh mint at the base or between fruit layers for a refreshing burst of flavor and a striking visual.
Fun Shapes and Sizes
Experiment with different sizes and cuts of fruit to create an abstract take on the traditional tree shape.
- Fruit Stars: Use cookie cutters to shape your fruits into stars and other festive icons for added cheer.
- Layered Look: Arrange your fruits by size, placing larger pieces at the bottom and smaller fruits toward the top for a visually appealing taper.
These variations not only make your Fruit Christmas Tree a delightful centerpiece but also ensure that it satisfies a range of tastes, making it the perfect option for any holiday gathering.
Cooking Tips and Notes for Fruit Christmas Tree
Creating a Fruit Christmas Tree can be as delightful as unwrapping gifts on Christmas morning. It’s not just a dish; it’s a centerpiece that brings joy to the holiday table. Here are some friendly tips to ensure your fruit creation shines!
Choose the Right Fruits
- Fresh is Best: Opt for seasonal fruits like strawberries, kiwi, and grapes. They not only taste better but also look vibrant and festive.
- Color Variety: Incorporate a range of colors to make your Fruit Christmas Tree visually appealing. Think reds, greens, yellows, and purples for a cheerful display.
Cutting Techniques
- Uniform Shapes: When cutting fruits, try to make them uniform in size for a polished look. This also helps them fit better on skewers or while arranging on a platter.
- Use Cookie Cutters: For a fun twist, use cookie cutters to shape fruits like melon into stars or holiday-themed shapes for added charm.
Presentation Matters
- Layering: Arrange fruits in layers from the largest to the smallest to create a more structured tree shape. This also makes assembly easier.
- Secure It Well: Use a sturdy base—perhaps a foam cone or a well-supported platter—to ensure your Fruit Christmas Tree won’t topple.
Add Complimentary Flavors
- Herbs and Greens: Fresh mint leaves or edible flowers can add a pop of color and freshness, enhancing the presentation and taste.
- Dips and Drizzles: Consider serving your tree with a yogurt dip or a light drizzle of honey for added flavor.
With these tips in mind, you’ll create a Fruit Christmas Tree that not only looks stunning but also brings a delicious burst of flavor to your holiday gatherings. Happy cooking!
Serving Suggestions for Fruit Christmas Tree
Creating a Fruit Christmas Tree is as much about presentation as it is about flavor. You want to capture that festive spirit, turning your vibrant fruit tower into a centerpiece that dazzles on the holiday table. Consider these delightful ideas:
-
Dip Options: Enhance your fruit experience with a selection of dips such as chocolate sauce, yogurt, or a honey-lime drizzle. Each adds a unique twist, making even the simplest fruit pieces irresistible.
-
Pair with Cheese: If you’re aiming for sophistication, serve with assorted cheeses. The creamy richness of brie or tanginess of goat cheese can elevate the flavor profile, creating a delightful balance with the sweetness of the fruit.
-
Add Nuts and Seeds: For a crunchy texture, sprinkle nuts or seeds around the base of your Fruit Christmas Tree. Almonds, walnuts, or sunflower seeds not only add nutrition but also enhance visual appeal.
-
Festive Garnishes: Consider scattering pomegranate seeds or mint leaves around your fruit creation for added color and flair. These garnishes can make your tree look even more enticing.
-
Serve Chilled: For the best taste, serve your fruit tree straight from the fridge. The chill will keep your fruits crisp and refreshing — perfect for those holiday parties!
With these suggestions, your Fruit Christmas Tree will not only be a feast for the eyes but a delightful treat for all!
Time Breakdown for Fruit Christmas Tree
Creating a Fruit Christmas Tree is not just a delightful centerpiece; it’s also a fun family activity that can bring everyone together during the holiday season. Here’s how you can break down the time needed for this festive recipe:
Preparation Time
Getting everything ready for your Fruit Christmas Tree takes about 20 minutes. This includes washing, peeling, and cutting a variety of fresh fruits into bite-sized pieces, making it easier to assemble and enjoy.
Assembly Time
Once everything is prepped, assembling your colorful fruit masterpiece should take approximately 30 minutes. Arrange the fruits on a sturdy base (like a foam cone or a plate), layering them to create that beautiful tree shape.
Total Time
In total, you’re looking at around 50 minutes for your Fruit Christmas Tree, from prep to finished product. A perfect way to infuse a bit of holiday cheer without taking up your whole day!
Nutritional Facts for Fruit Christmas Tree
Creating a Fruit Christmas Tree not only brings holiday cheer but also packs a punch in terms of nutrition! This festive treat is an excellent way to incorporate wholesome ingredients into your celebrations.
Calories
Per serving, the Fruit Christmas Tree delivers around 120 calories, making it a light yet satisfying snack option. With this treat, you can indulge your sweet cravings without the guilt.
Protein
While the primary ingredients are fruits, you’ll still find a modest amount of protein—approximately 1.5 grams per serving. Adding items like yogurt or nuts can increase this value if you’re looking to boost your protein intake!
Sugar
The natural sugars from the fruits in your Fruit Christmas Tree average about 18 grams per serving. These sugars provide a healthy energy boost while keeping the treat light and refreshing. Just remember, opting for a variety of fruits can help balance the sugar content while maximizing flavor.
FAQ about Fruit Christmas Tree
Creating a Fruit Christmas Tree is a delightful way to bring festive cheer to your holiday gatherings. It raises some common questions, so let’s dive into the most frequently asked queries to help you make an unforgettable centerpiece!
Can I use frozen fruit for the Fruit Christmas Tree?
Absolutely! While fresh fruit gives the best flavor and aesthetic, frozen fruit can work in a pinch, especially if fresh options are limited. Just be sure to thaw the fruit completely and drain off any excess moisture before assembling your tree. This will help maintain the structure and visual appeal of your fruity creation.
How do I keep the fruit fresh?
To keep your Fruit Christmas Tree looking vibrant and fresh, consider these tips:
- Assemble it close to serving time: The less time the fruit sits out, the fresher it looks.
- Refrigerate: Keep the tree in the refrigerator until you’re ready to serve it.
- Use citrus juice: Lightly coating fruits like apples and pears in citrus juice can help prevent browning.
- Mist with water: If you notice the fruit starting to dry out, lightly mist it with water shortly before serving to rejuvenate its appearance.
What if I’m allergic to any of the ingredients?
If you have allergies, customizing your Fruit Christmas Tree is a great solution. You can easily swap out any fruits that aren’t safe for you. Consider using a variety of other fruits that you enjoy or are safe for your dietary needs. Always keep an eye on any potential cross-contamination if preparing for guests with allergies, ensuring a safe and delicious holiday experience for everyone!
With these tips in hand, you’re on your way to creating a stunning and festive Fruit Christmas Tree that will brighten up any celebration!
Conclusion on Fruit Christmas Tree
Creating a Fruit Christmas Tree not only brings joy to your holiday gatherings but also adds a refreshing touch to your festive spread. This edible centerpiece bursts with vibrant colors and delicious flavors, making it a hit among guests of all ages. With a simple assembly of your favorite fruits and a little creativity, you can elevate your holiday decor while providing a healthy snacking option.
As you gather with friends and family, a beautifully crafted Fruit Christmas Tree serves as a delightful conversation starter, reminding everyone of the joyful spirit of the season. Make this year unforgettable with a tasty twist on your traditional holiday setup!
Print
Fruit Skewers with Pineapple Star
- Total Time: 20 minutes
- Yield: Serves 6
- Diet: Vegan
Description
A refreshing fruit skewer recipe featuring a pineapple star on top!
Ingredients
Scale
- 1 ripe pineapple
- 1 pear (a little underripe works best)
- 2 clementines (peeled and segments separated)
- 3 kiwi (ends trimmed then chopped into sixths with skin left on)
- 8 oz strawberries (stems removed)
- 6 oz blackberries
- 1–1/2 cups red grapes
- 1–1/2 cups green grapes
- 1 bamboo skewer
- toothpicks
Instructions
- Slice top and bottom off pineapple then cut a thin slice from the top. Press a star-shaped cookie cutter into the center of the thin slice then set star aside.
- Slice a little off the sides of the pineapple at an angle to create a cone shape.
- Push the bamboo skewer through the center, then skewer the pear on top, leaving the top of the skewer uncovered (you’ll skewer the star on top at the end).
- Place pineapple onto a serving tray then insert toothpicks around pineapple and pear at a slight angle, breaking a little off if necessary, then add fruit. I found it easier to place most of the bigger fruit first then fill in with the smaller fruit like grapes.
- Add the pineapple star to the top of the skewer then serve.
Notes
- This is a great recipe for parties or gatherings!
- Feel free to use any combination of fruits you prefer.
- Prep Time: 20 minutes
- Category: Dessert
- Method: No-Cook
- Cuisine: American
Nutrition
- Serving Size: 1 skewer
- Calories: 100
- Sugar: 15g
- Sodium: 5mg
- Fat: 0g
- Saturated Fat: 0g
- Unsaturated Fat: 0g
- Trans Fat: 0g
- Carbohydrates: 25g
- Fiber: 4g
- Protein: 1g
- Cholesterol: 0mg